JupyterLab and Google Colab Workshop Notebook Abridged#
Notebook Introduction - 🐸#
How to Use this Notebook#
This notebook allows you to both follow the text and interact with the code directly.
At the top page, you will see:

Select the icon on the left, the rocket ship:

Then go down to “Live Code”:
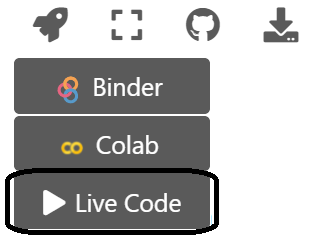
You should see at the top of the page a loading bar that cycles through mulitple states.


Then, finally:

Try this for yourself!
Here is a basic line in Python, after setting to Live Code. You can edit the Python code directly in the notebook 😀 😀 😀
2 + 2
4
Export to Binder or Google Colab#
As you can see you can also export these notebooks to Binder or Google Colab.
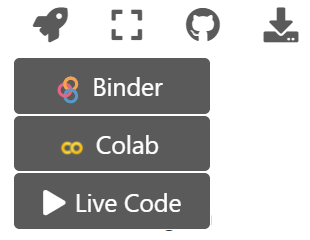
This will take you to their respective websites but you can work with them there, if you would like!
References#
I know it tradition to have the refences at the end of books, but when you are standing on the shoulders of giants. You thank them first.
B Granger and J Grout. Jupyterlab: building blocks for interactive computing. Slides of presentation made at SciPy, 2016.
Tamara Munzner. Visualization analysis and design. CRC press, 2014.
Hadley Wickham. A layered grammar of graphics. Journal of Computational and Graphical Statistics, 19(1):3–28, 2010.
Thank you!#
Also, a huge thank you to Adam Lavely (adamlavely) for developing some of the intial notebooks!
Introduction to JupyterLab - 🐘#
Where am I? (JupyterLab Notebook)#
Jupyter is a powerful suite of tools that allows us to do many things.
Jupyter is capable of running Julia, Python and R, as well as some other things.
Cells#
Each box is called a cell.
Two types of Cells#
Text#
Text Cells allow you to add text (via Markdown), which includes tables, images, links, bullet lists, numbered lists, LaTeX, blockquote, among other things.
Table#
| This | is   |
|------|------|
|   a  | table|
This |
is |
|---|---|
a |
table |
Image#


Link#
[Attribution](https://www.metmuseum.org/art/collection/search/436535)
Vincent van Gogh / Public domain The Metropolitan Museum of Art, New York - Purchase, The Annenberg Foundation Gift, 1993 - Attribution
Bullet List#
* I am a
    * bullet
* list
I am a
bullet
list
Numbered List#
1. I am a
  1. numbered
1. list
I am a
numbered
list
LaTeX#
$$e=mc^2$$
Blockquotes#
> This is a blockquote.
This is a blockquote.
Code#
Cells can be run using the Run button ► or selecting one of the run options under the Run menu.
Try this out! You can change what is in the cell and rerun the same cell, which is useful for debugging.
2 + 2
4
Your turn: In a new cell, figure out what 5315 + 5618 is.
## remove and type out 5315 + 5618
## then hit the play button
Jupyter ✨ MAGIC ✨#
When using other languages in Jupyter/JupyterLab, we need to designate the cell we are using with this langauge or function. To “activate” these language, we need to use ✨ MAGIC ✨. Here are a couple of examples.
HTML#
%%html
<ol>
  <li>apple</li>
  <li>banana</li>
  <li>cookies</li>
</ol>
- apple
- banana
- cookies
R Language#
In Google Colab, you do not need to install anything, but if you are going to do this on your local machine (your computer).

You will need to install a few things first. To do this, open up the Anaconda Prompt (anaconda3) and run the following two commands:
conda install -c r r-essentials
and
conda install -c r rpy2
finally,
%load_ext rpy2.ipython
In a new cell, we can then add our R code and see it working.
%%R
data <- c(1,2,3)
print(data)
Let’s try this out.
# Let's try here!
SQL#
%%capture
!pip install ipython-sql
What’s
%%capture
?
%%capture
is another bit of magic that captures the output of the cell and does not print it.
%load_ext sql
%sql sqlite:///exampleDatabase.db
More information can be found here: Jupyter ✨ MAGIC ✨
All About Google Colab - 🐦#
Working with Data#
For this notebook, we will be focusing on using Google Colab [Goo]
A Temporary Solution#
You can create and interact with files when you access Google Colab, BUT they will disappear after your session ends. An example would be:
f = open("thanosSnapping.txt", "a")
f.write("you should've gone for the head")
f.close()
Warning
Super serious here. If files are not written to your local machine or your Google Drive. They will be gone the next time you log in.
We need a better solution for this. So, let’s take a look at these options.
Connecting to Your Google Drive#
There are two ways to connect to your Google Drive.
Selecting the Icon to Connect#
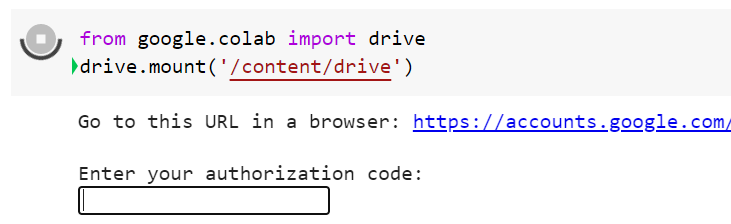
Connecting Using Google Colab Code#
from google.colab import drive
drive.mount('/content/drive')
This will look something like this:
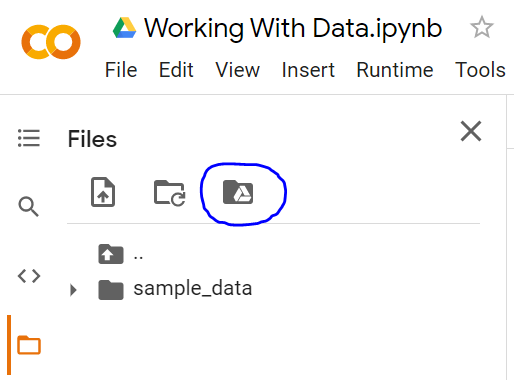
I am Connected, Now What?#
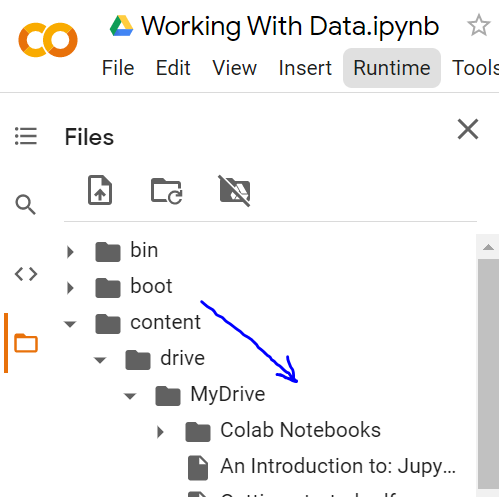
It can be a bit difficult to figure out where to place files and where your files are located in Google Colab. Once you connect, you will need to navigate the folder structure to find your file. They did not make this very easy to find. Here is a quick screenshot.
Connecting to Gitlab#
Another way to work with data outside of your Google Drive is using something like GitHub or, in our case GitLab. A bit of a warning before we begin.
Warning
Github is an open repository. Any file placed on Github is available for ANYONE to view, download, or edit.
Make sure you read of the terms of services as well!
For accessing GitLab through Penn State, here is the link (https://git.psu.edu/). You do need to setup a username/password to start creating.
If you are interest in using Git, let me show the basics.
Creating a Connection (SSH)#
The first step in this process is to create a connection between Google Colab and GitLab, and this starts with saying to Google Colab: You can connect to this resource because I gave you access. The way we do this is to create an SSH Key.
Note
Code will run in Google Colab but has been commented out to work on the website.
!ssh-keygen -t ed25519 -C "SSH key for google colab"
#!ssh-keygen -t ed25519 -C "SSH key for google colab"
To see this file, we will need to read the file using a UNIX command call 😸 (cat or concatenate)
!cat /root/.ssh/id_ed25519.pub
#!cat /root/.ssh/id_ed25519.pub
We now need to tell SSH that the PSU GitLab is fine to connect to (it is a known host).
!ssh-keyscan git.psu.edu >> /root/.ssh/known_hosts
#!ssh-keyscan git.psu.edu >> /root/.ssh/known_hosts
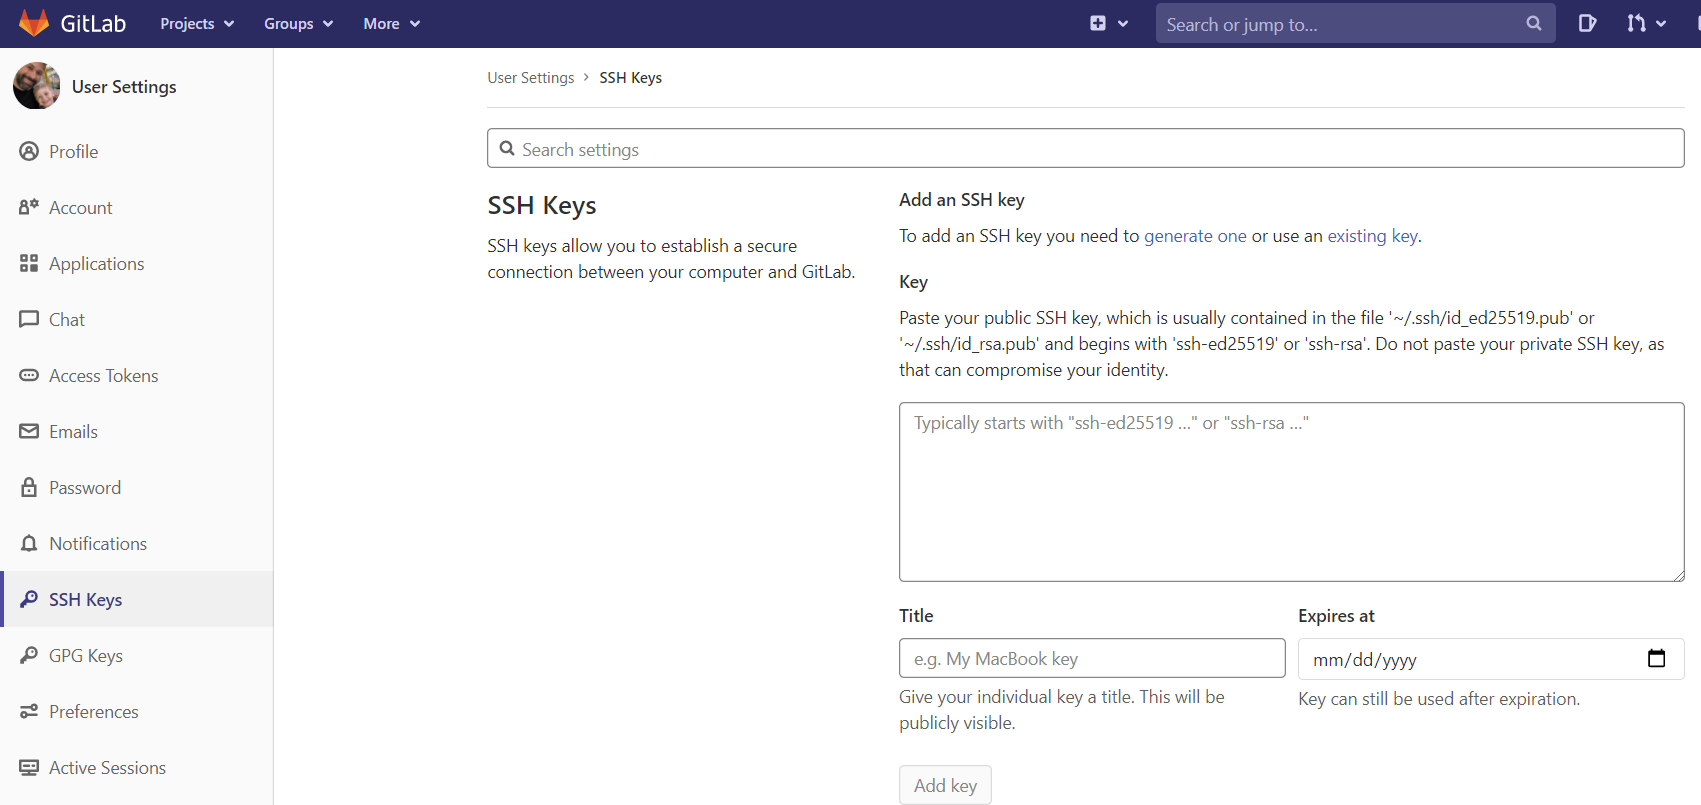
Now in GitLab, we need to add this SSH key to our account.
Finally, let’s test this connection.
!ssh -T git@git.psu.edu
#!ssh -T git@git.psu.edu
You should receive a message that looks like this:
Warning: Permanently added the ECDSA host key for IP address ‘...’ to the list of known hosts. Welcome to GitLab, @you!
The Push and Pull of Git#
Git, basically, is a push and pull mechanism. You pull your project down from GitLab. Make changes. Then push it back to GitLab. Here is an example of doing this with your file from before. First, we clone the repository.
!git clone git@git.psu.edu:pmd19/workshop_temp.git
#!git clone git@git.psu.edu:pmd19/workshop_temp.git
We then pull the current content from GitLab. Note cd stands for Change Directory, and PWD stands for Print Work Directory.
%cd /content/workshop_temp
!pwd
!git pull origin master
#%cd /content/workshop_temp
#!pwd
#!git pull origin master
We write our file to our directory and add it to the list of things we want to update on GitLab.
!pwd
f = open("thanosSnapping.txt", "w")
f.write("you should've gone for the head")
f.close()
!git add "thanosSnapping.txt"
#!pwd
#f = open("thanosSnapping.txt", "w")
#f.write("you should've gone for the head")
#f.close()
#!git add "thanosSnapping.txt"
Git wants to make sure it knows who is updating what, so it needs a person and an email address to associate the changes. We then commit to these changes, and finally, we push our changes to GitLab.
!git config --global user.email 'pmd19@psu.edu'
!git config --global user.name 'Patrick Dudas'
!git commit -m "testing"
!git push git@git.psu.edu:pmd19/workshop_temp.git
#!git config --global user.email 'pmd19@psu.edu'
#!git config --global user.name 'Patrick Dudas'
#!git commit -m "testing"
#!git push git@git.psu.edu:pmd19/workshop_temp.git